Friday, May 10, 2013

First Look: Canon 70-200mm f/2.8L IS USM II – Perhaps Canon’s greatest lens!


I had the good fortune today to get my hands on a pre-release copy of the Canon 70-200mm f/2.8L IS II USM lens. This lens features improved glass elements, faster auto focusing and amazing image stabilization improvements. It’s crazy here at the Olympics so I don’t have much time, but this is a case where a picture is indeed worth a thousand words.
I present to you images taken handheld from a man with carpal tunnel syndrome and tendonitis on my Canon 1D Mark IV using this amazing lens: (click for originals as these screen shots are low res samples with compression artifacts)
Click for original image 
Screenshot of a 100% Crop (200mm @ 1/60 sec ISO 400 – no flash)
Click for original image
Screenshot of a 100% Crop (200mm @ 1/15 sec ISO 100 – no flash)
Click for original
Screenshot of a 100% Crop (200mm @ 1/15 sec ISO 100 – no flash)
Click for original
Screenshot of a 100% Crop (200mm @ 1/8 sec ISO 50 – no flash)
          
These photos were shot as RAW and ZERO post-processing has been done on them. I simply exported them (without cropping or alignment) as JPEG from DPP (provided by Canon USA on site) from a Lenovo W700ds(replaced by the W701ds – the best photography computer in the world) and uploaded them to Smugmug. What you see is as raw as it gets, and the screenshots from Lightroom above shouldn’t be judged too harshly as they are low quality representatives of the originals.
In my online gallery, I’ve even included some shots where people were blinking to prove that these weren’t static subjects – they were indeed talking, breathing, blinking, etc… There are no monopods, tripods, or support used for these shots – simply freehand point and shoot in manual mode with auto ISO. IS was on and set to mode 1 and I used non-center AF points for most of these shots.
The 1/8 sec image probably impresses me the most given the fact this is nearly a 10 pound setup being hand held, and I have a result that can EASILY be sharpened to perfection. In fact, if I didn’t have to go down to ISO 50 (which is interpolated rather than a true ISO 50), I think the results would have been better. The images at 1/60 were clearly phenomenal and at least 2 stops better and several times sharper than what I would get with the original 70-200mm f/2.8L IS USM.
More to come when things aren’t so crazy. Time to eat! :-)
While you are here, take a look at the great discount coupon codes and other great articles on this blog.

Update

If you have the 1D Mark IV then I recommend you check out my Canon 1D Mark IV New Users Guide / Shoppers Guide. I am still in love with my 70-200mm f/2.8L IS II USM and feel it is the best lens Canon has made under the $5000 price point. It’s just an amazing piece of glass that was made to go with the Canon 1D Mark IV!
If you enjoyed this article, please support future articles like this by donating a dollar or saving several dollars by using my discount coupon codes. Either way, your support is greatly appreciated!
Click here to learn more about how this blog is funded.

REVIEW: Black Rapid RS-7–Yeah, it’s really worth it

Black Rapid RS-7 Camera StrapRS-7 mounts to any tripod mount point
Black Rapid RS-7 – Say goodbye to neck fatigue
A couple weeks ago I got an invite from Black Rapid marketing to visit them at the Photo Plus Expo in New York. At first I really wasn’t interested, but then I remembered how many of my friends had gushed over what a great product this was I decided to give them some of my time.
I never really noticed any issues with my camera strap so thought this was just another one of the billions of photography gadgets/gimmicks out there for sell that I really didn’t need. In short, I had zero interest in this product. In fact, even after watching the video below both when this product was all the buzz and here recently I still wasn’t convinced that I need it.

An odd, but lucky twist of fate

My meeting with Black Rapid was my very first meeting at the Expo and to be honest my body wasn’t moving that fast that morning so I ended up showing up 15 minutes late to our 30 minute meeting. We ended up not being able to sync up at that time so I promised I would be back, but in the back of my mind I thought “oh well, who cares” and moved on.
Being new to the Photo Plus Expo I was as prepared as boy scout with my Canon 1D Mark IV (with the 24-105mm) around my neck for taking photos, my Modular Set around my waist with way too much gear and anArtificial Intelligence 17. Yeah I was in my full on geek gear, and I had to spend the day walking around everywhere with all of that crap.
By the end of the day my shoulder and neck were getting pretty sore. The shoulder strap from the AI 17 needed more cushion (I’ve already told TTP I want a Urban Disguise series strap for that bag) and my Canon camera strap was digging into my neck. I guess because I was doing more walking and talking than shooting it bothered me more this time than ever before, because I never really recalled the strap being an issue. In fact, when people asked me to review the Black Rapid I scoffed saying that my Canon strap was plenty comfortable. However, this day I learned the hard way what everyone was saying. I literally had a mark on my neck that looked like a hickey, yet the source was from my camera strap.
When I saw this in the mirror I was horrified as I still had another day of meetings with partners, and sadly I hadn’t enjoyed the normal way of getting a hickey so I only had the embarrassment to live with. Frustrated by this I remembered my postponed meeting with Black Rapid and went by their booth.
While waiting for my media contact this cute girl from Black Rapid walks up to me and offers to give me a demonstration. Being the gentleman I am, I indulge the young lady and proceed to listen to her spiel. I got a chance to try all of the straps and personally found that my favorite was the RS-5. I preferred the RS-5 because it was wider and more comfortable, yet it also had storage in the strap which is great for a pocket geek like myself.
When I finally got a chance to talk to my marketing contact I had already been convinced. The weight on my shoulders and neck with the Canon strap versus any of the Black Rapid straps was significant. I wanted one, and was given a RS-7 on the spot (although truth be told, I’d rather the RS-5).
I used the RS-7 the entire next day and found it to be SIGNIFICANTLY better. At the end of the day I didn’t have any pain or strain (or hickeys), so my days using traditional straps have ended. I’m kicking myself for waiting so long to try one of these out after so many trusted friends insisted that I do it, so I’m here to admit I was wrong – these things are for real.

My Advice


Black Rapid RS-2 Sport with under arm “BRAD”
The RS-7 is a big improvement over your traditional strap, but I think the RS-5 is the strap to get. If you are a photographer on the move you might want to get the RS-2 as it includes the Black Rapid Arm Defense (BRAD) strap. However, I found that design to be annoying and uncomfortable, so I stick with my recommendation to go for the RS-5.
Room for Improvement
As much as I like the RS-7, there have already been two competing products who have contacted me to review their similar products. The competition has focused on the comfort of the strap and the design of the connection point. I’d like to see Black Rapid consider bringing some of those thoughts to their future designs.
One of the complaints I’ve heard about the black rapid is that your camera swings around and hits things. During the course of the conference I had probably 4 slight grazes (nothing serious), so I ‘d say that this is a valid concern. I think when used and tightened properly you’ll find that the camera doesn’t swing around much and its ready to go for quick shooting (as shown in the video). However, I found it best to throw my hand on the end of the lens just for my own mental comfort. My hood (of my 24-105) was in the active position and my lens was usually extended so I’d occasionally have the hood tap something (typically a garbage can or table edge). but there was never enough force to even scratch it.
Despite these issues, the RS-7 was much more stable / usable than my traditional camera strap. I’d call these areas for improvement in future designs, but not something that should cause you to shy away from this product. If you are still unsure, remember B&H has a 30 day return policy should you change your mind.

Where to buy (support this blog)

Click here to view or buy the full line of Black Rapid products at B&H. You can also get more information athttp://www.blackrapid.com. Stay tuned as I am hoping to have more exciting news from Black Rapid in the future.

Disclosure

I was at the expo on media press pass so I was given more attention than your average consumer as well as a free RS-7 strap to review. I may also get a commission if you make a purchase using links on this blog.
If you enjoyed this article, please support future articles like this by donating a dollar or saving several dollars by using my discount coupon codes. Either way, your support is greatly appreciated!
Click here to learn more about how this blog is funded.

B&H Hands-On: Nikon D7000 & 24-120mm f/4G ED VR


Nikon D7000 & Nikkor 24-120mm lens
Photo taken with a Canon 5D Mark II and 70-300mm f/4-5.6L IS USM
Allan Weitz has an article on B&H insights! called “The New Nikon D7000: Simply Amazing”, and after using this camera with the Nikon AF-S NIKKOR 24-120mm f/4G ED VR Zoom Lens I’d say I have to agree.
I’m a Canon shooter, but I had heard a lot of great buzz about this camera during the fall of 2010. While I had hands-on use of the D3D3s, and D700 over the year, as well as the occasional interaction with other models that my students own during my classes, I typically don’t write about my experiences. Much of my research is for my own use and for keeping my Which DSLR Should I Buy? article current, but I had such fun with this camera I thought I’d add my 2 cents for the record on the blog.
Keep in mind this article is really just a short blurb about my experience using this camera, but for a proper full review I recommend the DPReview review of the D7000.

A Word About The Images In This Article

All of the shots taken with the D7000 that appear in this article are straight out of camera JPEG originals that are hosted on my smugmug account. If you go to http://ronmart.smugmug.com/blog/nikon/d7000 you can see all the images in a gallery together as well as download the originals (for your personal and private viewing only – Copyright 2011 Ron Martinsen - all rights reserved). To download the original in-camera JPEG just hover over the image and choose Save Photo (the file folder with the down arrow icon) to save the original to disk as shown here:
SNAGHTML200d989e
Hover over photos to see the menu option to save originals

D7000 Camera Thoughts


1/60 sec at f/5.6, ISO 800, 58mm (18-105mm kit lens) SB-900 Flash @ –1 Flash Exposure Compensation
For this article, I had the Nikon D7000 DSLR Camera Kit with Nikon 18-105mm DX VR Lens but B&H also sent the  Nikon AF-S NIKKOR 24-120mm f/4G ED VR Zoom Lens as well as a SB-900 flash.
Mouse over to see 18mm, mouse out to see 105mm
I took a variety of shots with the kit lens and found the range to be quite useful and the results to be acceptable for a kit lens. The results naturally weren’t as good as the 24-120mm that I’ll talk about later in this review, and there’s a whole slew of great lens available in my Which Lens Should I Buy? article, but this is an acceptable starter lens for those on a tight budget.
Overall I found this camera to be very fun and easy to use. It’s very quirky going from Canon to Nikon so I struggled a bit at first to get used to the differences. After I got over this mental hump, I appreciated Nikon’s attempt to have all of your important controls available on physical camera body buttons instead of being nested in menus.
Pop-up Flash

1/60 sec at f/4.0, ISO 1600, 24mm (24-120mm)
Pop-up Flash Example
I’ve always been impressed with the quality of Nikon’s built-in pop-up flash, and this camera is no different. I felt it did a reasonable job of providing some fill light without sending a nuclear bomb of light onto my subject.
High ISO Performance

1/500 sec at f/4.0, ISO 6400, 100mm (24-120mm)
ISO 6400 looks pretty darn good
In typical modern-day Nikon fashion, the high ISO performance was outstanding. The shot above is not modified in any way (and to be fair you need to see a large one to appreciate noise) it came out of the camera pretty darn good. Now the camera does do a bit of its own noise reduction, but the raw image was definitely a lot better than what I’ve seen from the Canon 60D.

1/200 sec at f/4, ISO 2500, 24mm (24-120mm)
ISO 2500 is excellent out of camera & when printed
Naturally the images at 6400 were a bit softer on detail, but for a simple family snapshots like these I thought it did a good job.
White Balance

1/160 sec at f/4, ISO 2500, 105mm (24-120mm)
Fluorescent White Balance was much better than AWB
for this indoor shot under fluorescent lights
I’ve always despised Nikon’s Auto White Balance (AWB), and even some of the white balance presets, and this camera is no different here. I prefer the warmer and more vibrant results I get out of my Canon cameras, so I found myself wanting to do more post-processing work on the few images I played with than I’d typically do on my Canon images.
There’s a reason why Scott Kelby and Joe McNally are always talking about which white balance setting to use in Nikon cameras in their books – because Nikon’s AWB just doesn’t make good decisions much of the time.
Not all is well in paradise

The BM-11 LCD Cover for D7000 breaks easily
Photo taken with a Canon 5D Mark II and 70-300mm f/4-5.6L IS USM
I’m probably preaching to the choir of Nikon users, but I found out on my last day shooting with the D7000 that great care must be taken when trying to remove the LCD cover (BM-11) that is included with the camera. I just made one false move and it cracked instantly as shown in the photo above.
It’s funny that something that is meant to protect the LCD is so fragile, but I guess if you leave it in place you’ll be fine. I had to remove it because some moisture somehow made its way under and I wanted to clean it out quickly. Lesson learned, and apparently one that Nikon expects to happen as this is an easy to order part on B&H.

The Lens


1/200 sec at f/4, ISO 6400, 31mm (24-120mm)
I’ll cut to the chase and say that as a Canon user my 24-105mm lens is my go to ever day lens, but when I tested a D700 with the Nikon AF-S 24-70mm f/2.8G ED I fell in love. Just like the 24-105mm in the Canon camp, the 24-120mm offers consumers the trade off of weight and speed for a greater range and vibration reduction (VR). The tradeoff is great from the standpoint that this is a very nice range for this lens and the VR well, but this lens is no match for the sharpness of the Nikon 24-70mm in my opinion.

1/15 sec at f/11, ISO 4500, 120mm (24-120mm)
Vibration Reduction did its job very well here
If not compared side-by-side, I think anyone would love this lens as much as I did during my review. While it doesn’t have the wide angle or reach of the kit lens, I found it to be an excellent upgrade to get crisp, sharp images that were fewer and farther between in my daily testing of the kit lens. This is why you’ve probably noticed by now that most of my images in this article come from shots using the 24-120mm instead of the kit lens – despite shooting roughly the same amount frames with both lenses.

1/125 sec at f/7.1, ISO 160, 120mm (24-120mm)
The D7000 metering handled this tough contrast situation
very well in-camera under studio lights
For an unbiased and accurate review of this lens, look no further than SLRGear’s blur index tests where you can visually see where this lens is sharpest and where it fades out. As they mention in their review, I can confirm that I also saw a much higher than expected amount of Chromatic Aberrations especially at higher ISO’s. Even still, it is an improvement of SLRGear’s review of the Nikon 24-70mm ƒ/2.8G IF-ED AF-S which really has sharpness and speed going for it, but not much else especially it’s higher price tag.

1/200 sec at f/4, ISO 5000, 38mm (24-120mm)
Ultimately both the 24-70 & 24-120 are great lenses, so Nikon shooters face the same tough dilemma Canon shooters face, but if you buy either and simply ignore the other you’ll be a very happy camper as both are excellent lenses. For more information about my lens recommendations, please check out my Which lens should I buy? article.

SB-900 Flash


1/60 sec at f/4.0, ISO 200, 50mm (24-120mm)
SB-900 Flash @ –1 Flash Exposure Compensation is still very powerful
Joe McNally  shows the power of the Nikon flash system in his excellent books The Moment it Clicks and Hot Shoe Diaries, so I don’t really need to write much here about this flash. I will tell Canon users that when mounted to the hot shoe, I’ll take the Canon 580 EX II over this flash any day, but when you get the flash off the camera is where this flash’s power and Nikon’s CLS system really shine.
Here’s a good review of the SB-900 for those who are looking for more in-depth details about this product.

Conclusion


1.0 sec at f/5.6, ISO 100, 24mm (24-120mm)
I love the D7000.
If I had the extra money right now I’d keep this camera as it’s very fun to use and has a ton of powerful features I have yet to explore. It’s not a camera that makes me want to switch platforms, so I’m still very happy with my Canon gear, but I’d pick this camera over the D700 and D300s due to its great image quality, excellent features, and overall bang for the buck.Of course, people’s purchase decisions aren’t always about value, so naturally there are cases where you need the burst mode performance of the D700 but I can’t see why anyone wouldn’t pick this camera over the D300s.
I just barely tinkered with the video even though that’s an important feature of this camera. However, as a Canon5D Mark II and 1D Mark IV owner, I’m spoiled with amazing video features so I was a bit underwhelmed at first glance.
My main gripes with the D7000 are the slow burst mode (6 fps), the dual SD lots (no CF) instead of support for UDMA 6 Compact Flash, and too many megapixels. I’d sacrifice megapixels for quality any day, and I can’t help but think how much better its images would be if Nikon had thought the same thing.
From spouse friendly usability features like the scene modes, to important features like True HD (1920x1080) video and a greater ISO range, there is much to love about the D7000 (especially over the D300s). It’s no wonder these cameras are so hard to find in stock!
Click here to see full-size versions of all of the in-camera JPEG’s (sorry, no raw). All images are copyright Ron Martinsen, 2011, and may not be reused or retransmitted using any medium without expressed written consent. Downloads are for individual educational use only and should be deleted the same day of the download.

Ordering Info

Here’s where you can order yours:
If these products are not in stock and/or you decide to order elsewhere, please consider making a donation to this blog if you found this article useful.

Disclosure

B&H loaned me the gear for this article for a few weeks, and if you purchase using the links mentioned in this article I may get a commission. Thanks for supporting this blog by using the links, and coming back here if the item is out of stock right now.
If you enjoyed this article, please support future articles like this by donating a dollar or saving several dollars by using my discount coupon codes. Either way, your support is greatly appreciated!
Click here to learn more about how this blog is funded.

Nikon D7000


Nikon D7000 Review Image


Introduction


The Nikon D7000 is a new prosumer DSLR camera with a 16.2-megapixel DX-format image sensor. Key highlights of the D7000 include Full 1080p HD video with full-time autofocus and manual exposure control, an ISO range of 100-25600, the widest of any Nikon DX camera, a new 2,016-pixel 3D Colour Matrix metering system, new EXPEED 2 image-processing engine, new 39-point Auto-focus system with 3D tracking, 14-bit analogue-to-digital conversion, 6fps continuous shooting, dust- and moisture-sealed magnesium alloy body, 921k dot 3-inch LCD screen, and dual memory card slots. The Nikon D7000 costs £1099.99/ $1199.95 for body only and £1299.99 / $1499.95 for the body and the AF-S DX Zoom-Nikkor 18-105mm f/3.5-5.6G ED VR kit lens.

Ease of Use

The new Nikon D7000 slots in between the existing D90 and D300s models, not only in terms of feature set and functionality, but also in terms of size and weight. It isn't as compact and lightweight as the D90 but neither is it quite as bulky and heavy as the D300s. The right-hand grip bears more resemblance to that of the D300s, with a chunkier rubberised coating than on the D90. There's also a rubberised thumb rest on the back of the body.
The 18-105mm f/3.5-5.6G ED VR kit lens that ships with the D7000 feels well-balanced on the Nikon D7000 and despite only having a plastic mount it fits into place with a reassuring mechanical click. It also adds the very important advantage of Vibration Reduction. Nikon bodies don't offer any form of in-camera image stabilisation, unlike similar models from Sony, Pentax and Olympus, so the relatively affordable and versatile 18-105mm VR lens is a good starting point if you don't already have any Nikon lenses.
The shutter release action on the Nikon D7000 is surprisingly quiet, with an exemplarily dampened mirror slap that makes this DSLR actually quieter than some rangefinder cameras, and it's tested for 150,000 cycles. Furthermore, there is also a Quiet mode, in which the mirror is raised fairly slowly to further reduce the sound it makes. This, however, introduces some shutter lag, which usually isn't worth the few decibels of difference versus what is already an impressively quiet shutter (Nikon actually recommends using the Quiet mode for taking pictures of sleeping babies, a situation in which a bit of shutter delay obviously isn't a problem).
The overall control layout and 'philosophy' of the Nikon D7000 is very similar to the D90, with two control wheels and dedicated buttons for controlling ISO sensitivity, white balance, metering and AF mode. Only the combined Live View switch and Movie Mode button and lockable drive mode dial are completely new, with the former being an improvement on the D90 but the latter being somewhat awkward, requiring the use of both fore- and middle fingers. In addition the Playback button has moved to the left of the viewfinder in line with models higher up the range. This all means that upgrading from the D90 to the D7000 is a near seamless experience from a handling point of view.
Nikon D7000Nikon D7000
FrontRear
The D7000 uses a new EN-EL15 battery, MH-25 recharger and MB-D11 battery grip, which improves the handling but doesn't speed up the camera in any way. The D7000 records images on SD/SDHC/SDHC cards via not one but two slots housed in the large right-hand compartment. This allows you to use two cards in tandem, with the ability to overflow images onto the second card, backup images from the first to the second, or save RAW to slot 1 and JPEG to slot 2. It also obviously greatly expands the overall memory capacity, useful if you shoot a lot of images in a short space of time.
The Nikon D7000 follows conventional DSLR design in having a shooting mode dial on the top of the camera, which allows you to select either one of the advanced modes like Manual, Aperture- or Shutter-priority, or 19 different scene modes. The Exposure Compensation button is thoughtfully positioned next to the shutter release. Hold down this button with your right forefinger and spin the control wheel on the top-rear of the camera with your thumb to adjust its settings - simple and intuitive. The other button sitting next to the shutter release is for setting the metering. The D7000 has a similar monochromatic status LCD to the D90, a pro-level feature that indicates who this camera is primarily targeted at. On cheaper cameras, the LCD on the rear usually has to do both jobs, but on this model most of the key settings are visible from above on the smaller panel. This can make the Nikon D7000 quicker to use and it may also extend the battery life, depending on how extensively you use the rear LCD screen.
The D90's 12 megapixel CMOS sensor has been superseded by a 16.2 megapixel CMOS chip (the same sensor as used in the Sony A55), capable of providing a Live View feed, recording Full HD video and capturing full-resolution stills at 6 frames per second for up to JPEG 100 images, up from 4.5fps in the D90. There's also a a Continuous Lo shooting option (1-5fps). The sensor can clean itself by way of high-frequency vibrations that will, at least in theory, shake off any non-adhesive dust particles that may have settled on the low-pass filter during a lens change. You can specify, via an option in the Setup menu, whether you want sensor cleaning to take place at shutdown, startup, both or neither, with the default being 'both'. The cleaning process pleasingly has no practical impact on startup times, which were near instant. The new image sensor is complemented by the more powerful EXPEED 2 processing engine and a larger buffer as well.
The D7000 inherits the same excellent three-inch, 920,000-dot monitor as the D90. The screen is used not only to navigate menus and to review pictures, but can also act as a secondary status display, facilitating the transition for upgraders from entry-level DSLR owners who are not used to having a top-mounted status LCD on their cameras. It's also the rear screen that provides live view for capturing both stills and movies. For this reason, we were a little disappointed that the monitor was fixed, lacking articulation of any kind, something that one of the D7000's key rivals, the Canon EOS 60D, does offer.
Nikon D7000Nikon D7000
Front
Side
You still get a true optical TTL finder as well though, and it's an excellent to boot. The key difference between the D90's and the D7000's finders is the frame coverage, with the former at 96% and the latter at an impressive 100%. The auto-focus system has also been significantly upgraded, with the centre point permanently marked on the focusing screen the other 38 points lighting up as red boxes, and compositional grid lines that can be called up via a menu option. Three warning signs – reminding you that you are in black-and-white capture mode, the battery is running low or you have forgotten to insert a memory card – may also appear in the form of overlaid icons when appropriate. Below the finder is a traditional monochromatic status bar that is the same as the one seen in the D90.
As stated above, the D7000 has 39 auto-focus sensors, out of which 9 are a cross type. The other 30 are of the line variety, consequently being only sensitive to either vertical or horizontal detail, but not both. In practice, this did not turn out to be a problem, with the camera typically locking focus on the subject easily, no matter which AF point was selected. Be aware though that the default AF area mode is 'auto-area' in most of the scene and exposure modes, including P, A, S and M as well. In auto-area mode it is the camera, rather than the photographer, that chooses which AF point(s) to use, which is usually not desirable. You can change this to single-point, dynamic-area or 3D-tracking AF. Single-point AF is what you will want to use most of the time, as it gives you the opportunity to specify which of the 39 auto-focus sensors should be engaged. In the viewfinder, the active AF point appears as a red square, which is easy to see. Selecting the active AF point is done by holding down the Af mode button and using the four-way pad, unless the focus selector lock is in the L (=Locked) position.
If you select dynamic-area AF, you can also specify an AF point, but the camera 'will focus based on information from surrounding focus points if subject briefly leaves selected point', as the user guide puts it. This is the default AF area mode in the Sports scene mode. More interesting is the 3D focus tracking feature. Basically this lets you specify the focus point that is right on your subject, then the camera will attempt to track this subject as it moves across the frame, using whichever AF point it deems appropriate in any given moment. Apparently, the camera does this using colour information from the new 2,016-segment RGB metering sensor to identify the subject. In the field, it was quite astounding to see 3D focus tracking in action.
The modus operandi of the auto-focus system can also be specified by the photographer. There is nothing new here: AF-S is for stationary subjects – an AF assist lamp is available for use at close range in low light – AF-C is for moving ones, while AF-A is the best of both worlds. Cycling through these modes is done by holding down the dedicated AF button on the left-side of the camera, and turning a control wheel. Note that some of the AF area modes, namely dynamic area and 3D focus tracking, will only work the way described above if you are either in AF-A or AF-C. The camera also allows you to focus on your subject manually. To do this, turn the AF/MF switch, found below the lens release button, to the position marked with an 'M', and use the MF ring on the lens to focus.
Nikon D7000Nikon D7000
Pop-up FlashTop
One area of photography that the D7000 is particularly well suited to is flash photography. The camera has a built-in speedlight with a guide number of 12 (in metres) at ISO 100. In auto mode, this flash will pop-up automatically if the camera thinks it's necessary, but in most other exposure modes, it is left to the photographer to decide whether to use it or not. This little flash can not only be used as an emergency light source or a fill light, but also as a commander for up to two groups of wireless flash units. In such a setup, you can specify if you want the on-board flash to give only a signal to fire off the wireless slaves or also to provide some fill light. It is also possible to chose the mode of operation (TTL, Auto or Manual) for one or both of the slaved flash groups, and even to regulate their output from the camera. Compatible flashguns include the SB-900, SB-800, SB-700, SB-600, and SB-400 flash units.
As with most recent DSLR cameras from both Nikon and the other manufacturers, the D7000 offers Live View off the main sensor. Live View has its own dedicated spring-loaded switch on the rear of the camera. Move it to the left and the mirror flips up, the shutter opens and the rear screen displays the scene as seen through the lens. Live View is either delivered on the high-resolution rear monitor or on any LCD panel or plasma screen connected to the camera via an HDMI cable. There is a red rectangle in the middle for focusing , which you can move practically anywhere in the frame. When in manual focus mode, you can magnify into this rectangle in five steps simply by repeatedly pressing the button marked with a loupe icon, but this magnification seems to be interpolated rather than real. This means that you cannot see detail down to the pixel level, unlike with many competing cameras, which was a disappointment given the excellent LCD screen.
Manual Focus is not the only focusing option in Live View when taking still images. The D7000 has two AF modes in Live View, AF-A and AF-F. Both employ a contrast-detect method of focusing, with AF-A locking onto the subject when you half-press the shutter button, and AF-F (full-time-servo AF) automatically tracking the subject continuously even if it moves. The D7000's Live View auto-focusing isn't very fast, typically taking between 1 and 2 seconds to lock focus on a subject in good light, and eben longer in low-light conditions. There are selectable AF-area modes according to the subject; face-priority AF, wide-area AF, normal-area AF and subject-tracking AF. 'Face-Priority AF' had no problem finding and keeping track of human faces as long as they were facing the camera, and the system can detect up to 35 faces and will attempt to focus on the one closest to the camera.
The amount of overlaid information is user selectable, and can include a shooting grid similar to what you can see in the optical viewfinder and also the new virtual horizon which helps to keep your images straight. This feature can also be turned on and off via the reprogrammable Fn button, which can be assigned to a range of different functions, and also appears in the optical viewfinder status bar via the exposure compensation scale. But there's still no live histogram, as on the D90, which is a glaring omission that makes Live View much less usable than it could be, and again puts Nikon behind the competition in this area. Photographers who intend to use Live View mainly for tripod work will, on the other hand, be delighted to learn that the camera offers true mirror lock up
Nikon D7000Nikon D7000
TopBottom
Live View is also employed by the Nikon D7000's movie mode. After moving the Lv switch to the left and optionally presetting the aperture, shutter speed and focus, you can start recording video by pressing the Movie button with the red dot sitting within the Lv switch. The camera records full high-definition, wide-screen video in 1920x1280 pixel resolution, at a frame rate of 24fps, in AVI format using the motion JPEG codec. As with Live View, contrast-detect AF is possible whilst shooting movies, although as with still images there's an audible whine as the camera refocuses and it's still too slow to focus on any fast-moving subject, so much so that we suspect most serious users will use manual focusing instead. Although the D7000 can automatically focus during video recording, the first DSLR to do so, it's just not fast enough to warrant regular use or to rival cameras like the Panasonic Lumix GH1/2.
You can set both the aperture and the shutter speed from the camera in movie mode, although the slowest shutter speed is limited to 1/30th second, plus exposure compensation and AE-Lock can also be set. Out of the box the D7000 can only record monaural sound via its built-in microphone with three different levels of sensitivity on offer, but stereo recording can be recorded using an optional external microphone. The maximum size of a single video clip is 2 gigabytes which, given that movies occupy about 100 megabytes of storage space per minute, would theoretically translate into about 20 minutes of continuous recording, but – apparently because of certain legal regulations in the EU –, Nikon decided to limit the clip length to 5 minutes for high-definition movies.
For the images already captured, the Nikon D7000 offers a broad range of retouching tools, including post-capture D-lighting (useful if you forgot to turn on Active D-lighting before capture), red-eye correction, trimming, monochrome conversion, different filter effects, colour adjustments, image resizing, image overlay, in-camera raw processing, quick auto retouching, straightening of crooked pictures, lens distortion correction, perspective control (reduction of keystoning), and new fisheye, miniature, colour outline and colour sketch effects. Many of these functions make it unnecessary to buy specialised computer programs or plug-ins and spend hours in front of a computer to achieve a desired/popular effect. Interval timer shooting is a powerful feature and something that isn't offered by the D90. Check out our article on time-lapse photography in our Techniques section to get an idea of what you can use this feature for.
As far as connectivity goes, there are USB / VideoOut and Mini HDMI ports as well as an accessory terminals for the connection of an external microphone and either wired remote or a GPS unit, all sheltered behind two rubberised doors on the left side of the camera, when viewed from the back.

8 Steps to Choosing Lenses for Your DSLR Camera


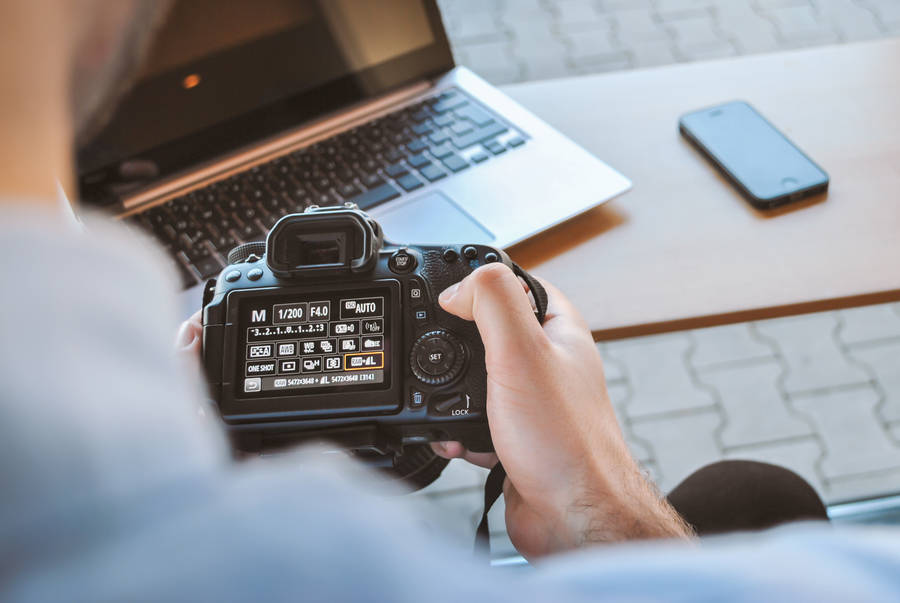
Step 1 – What do you like to shoot?

To me this is the most important question. Now, if you answered “everything”, try narrowing it down just a bit. icon wink 8 Steps to Choosing Lenses for Your DSLR Camera In my case, when I started out, I loved shooting bugs and flowers. I was often at the cottage and always had my D70 with me. But my Nikkor 18-70mm just wasn’t doing it for me. So I asked myself, “what kind of lens do I need to get great bug shots?” And after a bit of research I found out that macro lenses were perfect for my need. So I went out and purchased my second lens ever, the Sigma 105mm macro.
vide 8 Steps to Choosing Lenses for Your DSLR Camera
So? I’ll ask again. What do you like to shoot most? Is it birds? Then maybe a Canon 100-400mm IS would be best. Concerts? You’ll need a fast lens for low light situations so a50mm f1.4 might suit your needs.
vide 8 Steps to Choosing Lenses for Your DSLR Camera
remember to ask yourself this question before every lens purchase or you might end up with glass accumulating dust at the bottom of a bag. I know, I have a few. icon wink 8 Steps to Choosing Lenses for Your DSLR Camera
vide 8 Steps to Choosing Lenses for Your DSLR Camera

Step 2 – Do your research

Ok, so you figured out what type of lens is best for what you want to shoot. Great! But there are many to choose from. Which one, which one? Well, you’re probably wondering why I chose the Sigma 105mm over the Nikkor 105mm. The answer is simple. I did my research. I just typed “sigma 105mm review” in Google and then the same for the Nikkor 105mm. In a nutshell, I found out that both lenses had about the same image quality but the Sigma was $300 cheaper. And since I knew this lens wasn’t going to be used to generate income (even if I get their good side, bugs don’t sell well on stock sites icon wink 8 Steps to Choosing Lenses for Your DSLR Camera ), I went with the less expensive one.
vide 8 Steps to Choosing Lenses for Your DSLR Camera
You can find some great  lens reviews online. You can also check out DPReview and Lens-Reviews for user feedback.
vide 8 Steps to Choosing Lenses for Your DSLR Camerasigma 105.thumbnail 8 Steps to Choosing Lenses for Your DSLR Camera

Step 3 – How picky are you on image quality?

Don’t get too freaked out when you read some of the reviews out there. They tend to be very technical and sometimes, and I do stress sometimes, nitpick on the most minor details. That said, some lenses are just plain horrible. Luckily, in the lens world, most of the time you get what you pay for. Also, you have to ask yourself if this is a hobby or are you planning on making money with your photography? I know people that have bottom off the line lenses and are very happy. So go into the store and check them out. Better yet, do step 4!
vide 8 Steps to Choosing Lenses for Your DSLR Camera

Step 4 – Give it a test drive

So you’ve read the reviews and you found the one you want. Super! Before forking over the cash, why not play with it for the weekend? Most cities will have camera stores that will rent out lenses. It’s usually pretty cheap to rent a lens and I personally think it’s a great investment.  You can see the results on your computer and test it out in various situations. Something you can’t do in the store when you only have 2 minutes to play with it. Test it for what you’re actually going to use it for mostly remember step 1?). If you love shooting sports, I wouldn’t recommend shooting flowers in a vase. icon wink 8 Steps to Choosing Lenses for Your DSLR Camera
vide 8 Steps to Choosing Lenses for Your DSLR Camera

Step 5 – What’s your budget?

A very important question indeed. If you’re a pro and you know that your new lens will pay itself off with your next 2 contracts, it’s a no-brainer. But if you’re an amateur, this becomes important. You need to ask yourself how much are you willing to spend for your hobby? Make yourself a yearly photo budget that is within your means. I strongly recommend not getting into debt for a hobby.
vide 8 Steps to Choosing Lenses for Your DSLR Camera
But if you really, really, really want that 70-200mm VR and you can’t afford it full price, try getting it used on Ebay. Sometimes, even your local photography store will sell used equipment. You won’t get super deals if the lenses are in good condition because lenses have a high resale value but you can save around 10-20%.
vide 8 Steps to Choosing Lenses for Your DSLR Cameranikon 70 200mm.thumbnail 8 Steps to Choosing Lenses for Your DSLR Camera

Step 6 – 3rd party lenses

Ok, some of you are purists out there and I respect that. But there are other alternatives from companies like SigmaTamron and Tokina. They also make lenses with either aCanon or Nikon mount. We call them 3rd party lenses. They used to be of lower quality but have improved dramatically over the last 5 years. They actually give the big boys a run for their money. I actually own 2 Sigma lenses.  If you’re on a tight hobby budget, 3rd party lenses can be great since they’re usually cheaper (sometimes more than 50%!).
vide 8 Steps to Choosing Lenses for Your DSLR Camera

Step 7 – Image Stabilization

Should you get image stabilization in your lenses? Before asking that question, what does it do? Basically, it lets you shoot at a slower speed hand-held without blur. Usually, the average photographer can shoot hand-held as slow as 1/60 sec. without blur. With image stabilization, you could, on average,  shoot as slow as 1/15 sec. without blur due to camera shake. Image stabilization is for camera shake only. It’s there to stabilize your camera not your subjects. icon smile 8 Steps to Choosing Lenses for Your DSLR Camera It’s great for low light situations.
vide 8 Steps to Choosing Lenses for Your DSLR Camera

Step 8 – How important is aperture?

I’m finishing off with this step because this might play a major role in your lens selection. As you might already know, the smaller the f-stop number, the wider the opening and the more light comes in which means you can shoot at faster speeds. Sometimes you’ll find lenses that seem the same at first glance but one is cheaper than the other and you wonder why. Check the maximum aperture. For example, you can get a 50mm f1.8 and a 50mm f1.4. The first one is $135.00 and the second is $500.00. Big price difference but if you’re shooting in low light all the time and you’re making money with your images than it might be worth it.
vide 8 Steps to Choosing Lenses for Your DSLR Camera

Final thoughts

One thing that I keep suggesting to fellow photographers looking to buy a new lens is to look at lenses like an investment. Camera technology advances at a neck breaking speed so camera bodies change fast and loose value. Lenses, on the other hand, don’t. That’s why lenses retain their resell value. You camera bodies will change over the years but your lenses won’t so get good glass right away. Even if you need to wait an extra few months to save up, you won’t regret it. Working with good equipment makes for a pleasurable experience and therefore better photos! icon smile 8 Steps to Choosing Lenses for Your DSLR Camera